Short answer
A white halo around a cutout is the old background still mixed into the edge pixels: they are partly transparent, but their colour came from the light backdrop, so they glow on anything darker. Fix it by shrinking the edge by 1 or 2 pixels (Edge shift in getPNG, Shift Edge or Defringe in Photoshop) or by recolouring the edge with Decontaminate Colors. Jagged edges come from a hard or enlarged mask; a slight feather hides them.
A white halo around a cutout is the thin, light outline that appears when you put a cut-out subject on a darker background: a glow around a person’s shoulders, a pale ring round a product, bright fuzz in the hair. Its cousin is the jagged edge, where a smooth curve becomes a staircase of pixels. Both look like a bad background removal, and sometimes they are, but more often they are the natural result of how edges are photographed, and both can be reduced in seconds once you know which one you have.
This guide explains what causes each, how to tell them apart, and how to fix them in getPNG, Photoshop, Photopea and GIMP, including what each fix costs you.
What a halo actually is
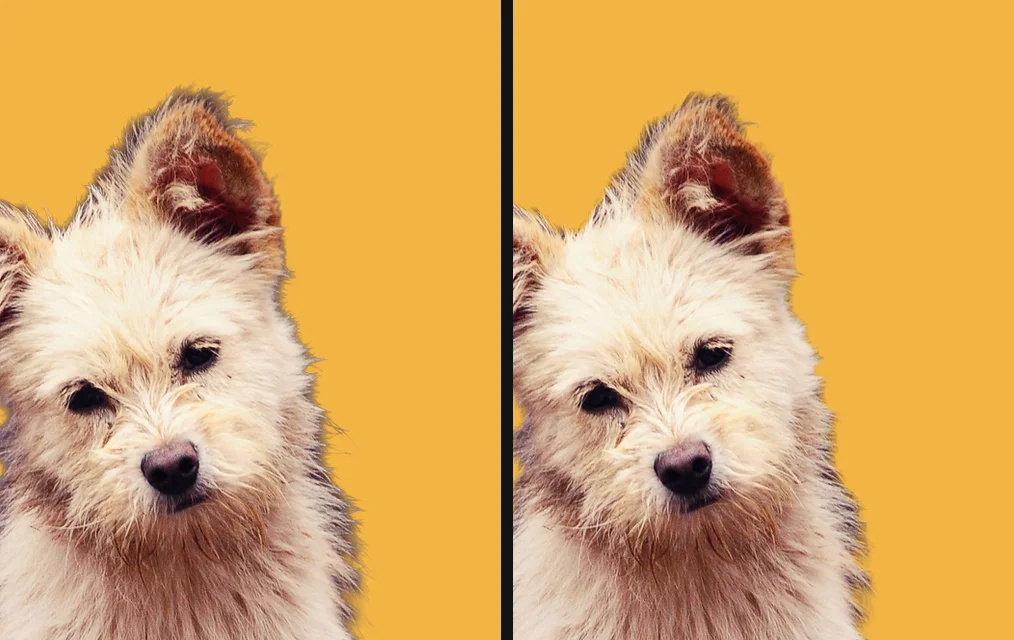
A camera does not see sharp edges. Where a shoulder meets a white wall, the pixels along the boundary each contain a little of both: some skin or fabric, some wall. Lenses soften the boundary slightly, hair and fur are finer than a pixel, and motion adds more blur. So a real edge is a band one to several pixels wide in which colour gradually changes from subject to background.
A good cutout handles that band with partial transparency: an edge pixel that is half subject becomes half opaque. That is the right answer for the opacity. But the pixel’s colour is still the colour the camera recorded, which is half subject and half white wall. On a white page, nobody sees a problem, because the missing half is white anyway. Put the cutout on dark blue, and every edge pixel now shows its leftover white, blended over blue. The result is a pale rim: the halo. Retouchers call it colour contamination or fringing, and a dark background behind the original photo causes the same effect in reverse, as a dark rim on light backgrounds.
This matters because it tells you what can fix it. The opacity at the edge is usually right. The colour is what is wrong. There are two ways to deal with that: remove the contaminated pixels (shrink the edge), or change their colour (decontaminate).
Three edge problems that look alike
Before fixing anything, work out which of these you have. Zoom to 200 or 400 per cent on a dark background.
| What you see | What it is | Main fix |
|---|---|---|
| A thin light or dark rim that follows the outline | colour contamination from the old background | shrink the edge, or recolour it |
| A staircase of hard pixel steps along curves | a hard (thresholded) or enlarged mask | a soft full-resolution mask, or a slight feather |
| A soft, blurry, too-wide edge | a small mask stretched to fit the photo, or too much feathering | a mask fitted to the full-size photo; less feather |
| Chunks of old background left in gaps | the selection missed an area | fix the selection, or erase by hand |
Why edges come out jagged
Jagged edges have two usual causes. The first is a hard mask, where every pixel is either fully kept or fully removed with nothing in between. Magic wand selections without anti-aliasing do this, as does any tool that thresholds a soft mask to make it “clean”. The second is a small mask enlarged. AI background removers usually run their model at a fixed size, often around 1,000 pixels, and a cheap way to apply the answer to a 6,000-pixel photo is to stretch the mask six times. Each mask pixel becomes a six-pixel block, and curves become steps, or, if the stretch is smoothed, a blurry band.
getPNG avoids the second cause by design: its model answers at 1024 pixels (320 on the processor), and a guided filter then fits that answer to the real edges of the full-size photo, so the outline follows your pixels rather than an enlarged mask. The soft values along the edge are kept, not thresholded, because that softness is what makes hair look like hair. The alpha channel, in plain words explains why those in-between values matter.
Fix a halo in getPNG: Edge shift and Feather
After a cutout, getPNG has two edge controls, and both apply to the full-resolution result in a fraction of a second, because the model does not run again.
- Pick a dark background to check against. In the background choice, select black or a colour close to where the cutout will go. The preview shows the cutout over it, so any rim is visible.
- Move Edge shift below zero. Edge shift grows or shrinks the outline by up to five pixels. Negative values shrink it, pulling the edge inwards and cutting away the outer band of pixels where most of the old background colour sits. Start at minus 1, then try minus 2.
- Add Feather only if the edge now looks cut out with scissors. Feather softens the edge. A little helps a hard, stepped outline blend into its new background. Too much makes the subject look out of focus and widens any remaining rim.
- Use the compare view to look at the original beside the cutout, and make sure shrinking did not eat into details you want to keep.
- Download the transparent PNG, or a JPG, PNG or WebP on the colour you chose.
Find the right Edge shift in thirty seconds
- Remove the background from a portrait or product shot taken against a light wall.
- Set the background to black and zoom into the edge of the hair or the shoulder.
- Step Edge shift from 0 to minus 1, then minus 2, and watch the outline.
You should see: the pale rim thinning or disappearing at minus 1 or minus 2, while the outline stays where the subject really ends. That is usually the setting to keep.
If you do not: if the rim is still there at minus 3 while fine details such as hair tips are already disappearing, the contamination is inside the subject’s edge detail, not in a band around it. Shrinking further will only eat the subject; this is a job for colour decontamination in an editor, described below.
The honest limit: shrinking an edge removes pixels, so it also removes the outermost strands of hair, the fuzz of a sweater and the tips of fur. getPNG does not yet recolour edge pixels (colour decontamination), and it has no brush to fix one area by hand. For a portrait with flyaway hair against a bright sky, you will get a better result by finishing the cutout in one of the editors below.
The free way
Cut out, then pull the edge in by a pixel
Drop the photo on getPNG, set the preview background to black, and move Edge shift to minus 1 or minus 2. The cutout stays at the full resolution of the original, and the sliders answer instantly.
Fix a halo in Photoshop
Photoshop has the most complete set of edge tools. These menu names follow Adobe’s current Photoshop help pages, checked September 2026.
Defringe and the matte commands (quick, for an existing cutout)
- Select the layer that holds the cutout (pixels removed, not a layer mask).
- Choose Layer, then Matting, then Defringe.
- Enter a width. Adobe’s advice is that 1 or 2 pixels is usually enough. Defringe replaces the colour of edge pixels with colour from pixels further inside the subject.
If the subject was cut from pure white or pure black and the edge is a smooth, anti-aliased one (text, logos, simple products), Layer, Matting, Remove White Matte or Remove Black Matte undo the blend more exactly than Defringe.
Select and Mask with Decontaminate Colors (best for hair)
- Make a selection of the subject (Select Subject is a good start), then choose Select, then Select and Mask.
- Paint over the hair outline with the Refine Edge Brush so Photoshop recalculates the soft edge there.
- Under Global Refinements, a small negative Shift Edge moves the edge inwards, exactly like Edge shift in getPNG.
- Scroll to Output Settings and tick Decontaminate Colors. Photoshop replaces the colour fringe with the colour of nearby fully selected pixels; the Amount slider sets how strongly.
- Output to a New Layer with Layer Mask. Decontamination changes pixel colours, so it cannot output only a selection.
This is what the professionals use for hair, and it is the one step getPNG does not do yet. Removing a background in Photoshop covers the rest of the workflow.
Fix a halo in Photopea
Photopea is a free browser-based editor modelled on Photoshop. Its Refine Edge tool (under Select, then Refine Edge, or the button in the top panel of any selection tool) works from a trimap: you paint what is definitely subject in white, definitely background in black, and the uncertain edge in grey. According to Photopea’s own documentation, it then works out both a new transparency and a new colour for each grey pixel, which is colour decontamination. Choose the output that creates a new layer, because the other outputs keep only the transparency and throw the corrected colours away. See removing a background in Photopea for the full steps.
Fix a halo in GIMP
GIMP 3.0 has no one-click decontamination, but shrinking the edge is straightforward (menu names from the GIMP 3.0 documentation, checked September 2026):
- With the cutout layer active, choose Layer, then Transparency, then Alpha to Selection. This selects the subject.
- Choose Select, then Shrink, and enter 1 or 2 pixels.
- Choose Select, then Invert, so the selection is now the thin edge band plus the empty background.
- Press Delete to clear it, then Select, then None.
- For a softer result, feather the selection (Select, then Feather) before deleting.
Avoid Layer, Transparency, Threshold Alpha for photos: it makes every edge pixel fully opaque or fully transparent, which removes the halo by making the edge jagged. It is useful for pixel art and hard logos, not for people. Removing a background in GIMP covers making the cutout itself.
How to avoid halos in the first place
The fastest fix is the one you never need:
- Shoot against a background close in brightness to the final one. A subject photographed against mid-grey leaves a grey fringe that is almost invisible on both white and black. A subject against a bright window leaves a glow on everything darker.
- Keep light off the backdrop behind the edges. Strong backlight wraps around hair and shoulders, putting background colour deep into the subject.
- Avoid heavy JPG compression before the cutout. Compression smears colour across edges, which widens the contaminated band.
- Do not enlarge a finished cutout. Scaling up a PNG stretches its soft edge into a blurry band and makes any rim thicker. Cut out from the largest original you have.
- Place the cutout on its real background before judging it. A slight fringe that matters on black may be invisible on the pale colour you actually use.
When nothing fixes it completely
Some edges resist every tool, and it is better to know which before spending an hour:
- Fine hair against a bright, blown-out sky. The strands are thinner than a pixel and the background is pure white inside them. There is no subject colour left to recover.
- Motion blur. A moving hand is smeared across the background; the “edge” is several pixels of transparent blur that no longer has a clear colour.
- Glass, veils and smoke. They are genuinely see-through, so the old background is part of what they look like. A cutout of a glass will always carry some of the scene it was photographed in.
- A subject the same colour as its background. A white shirt against a white wall gives the model and the editor nothing to separate.
For those pictures, the realistic options are a reshoot against a better background, a hand-drawn mask by a retoucher, or choosing a final background that hides the fringe. Clipping paths and image masking explains what to ask for if you hire the edge work out.
If what you are cutting out is a logo or flat artwork rather than a photograph, there is one more option: trace it instead of cutting it out, so the outline becomes a path and there are no part-transparent pixels left to carry the old colour. getSVG, our sibling site, has the version of this problem that happens when you trace. It looks identical and has a different cause.
The steps, in short
- Look at the edge on a dark colour. Put the cutout on black or a dark colour and zoom to 200 to 400 per cent, so you can see whether you have a light rim, a dark rim or a stair-stepped outline.
- Shrink the edge by a pixel or two. Move the outline inwards by 1 or 2 pixels, which trims away the band of pixels that still carry the background colour.
- Soften a jagged outline. Add a small feather, 1 pixel at first, so a hard stair-step edge blends into the new background.
- Recolour the edge where you can. In Photoshop or Photopea, use colour decontamination so edge pixels take the colour of the subject instead of the old background.
- Check again on the real background. Place the cutout on the colour or photo it will actually be used on, and export as PNG.
Questions
Why is there a white outline around my cutout?
The pixels along the edge were a mix of subject and background when the photo was taken. The background was removed, but their colour still contains some of it. On a white page nobody notices; on a dark one, that light colour shows as a thin glowing outline.
How do I remove a white halo in Photoshop?
With the cutout layer selected, choose Layer, Matting, Defringe and try a width of 1 or 2 pixels, or Remove White Matte if the subject was cut from pure white. For hair, redo the edge in Select and Mask with Decontaminate Colors ticked under Output Settings, output to a new layer with a layer mask.
Why are the edges of my cutout jagged?
Either the selection was hard, with every pixel fully in or fully out, or a small mask was enlarged to fit a large photo, which turns each mask pixel into a visible step. A soft, full-resolution mask gives a smooth edge; a 1 pixel feather hides mild stair-stepping.
Does feathering fix a white halo?
Not by itself. Feather makes the edge softer, which hides jagged steps, but it spreads the contaminated edge colour over more pixels and can make a halo wider. Shrink the edge first, then feather only if the result looks too sharp.
Can getPNG remove colour fringes?
getPNG has Edge shift, which shrinks or grows the outline by up to five pixels, and Feather, which softens it. Both apply instantly at full resolution. It does not recolour edge pixels yet, so for a light fringe inside fine hair, finish the cutout in Photoshop or Photopea.