Short answer
To overlay images convincingly, put a cutout on top of a background and fix the four things the eye checks first: the cutout (a real alpha channel with a soft edge, not a box), the edge (no pale rim from the old background), the shadow (a soft contact shadow that gives the subject weight) and the scale (the subject at the size its distance implies). getPNG makes the cutout and can add a drop shadow, but it does not place one picture on another: you do that in the app you already use, such as PowerPoint, Canva, Photoshop, GIMP or Photopea.
Laying one picture on top of another takes a minute in any editor with layers. Making it look as if the top picture was always there takes a little longer, and it comes down to a short list of things the eye checks before it checks anything else. This page goes through them in the order they are worth fixing.
A word on what getPNG does here. It cuts the subject out of a photo and gives you a transparent PNG at the full resolution of the photo, and it can add a soft drop shadow built from the cutout’s own outline. It does not put one picture on top of another. That step happens in the app you already use for slides, posters or photos, and this page names no steps specific to one of them, because the layers behave the same way in all.
Start with a real cutout
An overlay is only as good as the picture that sits on top, and the first requirement is that it has nothing around it. A photo laid over another photo covers it with a rectangle, because a JPG has no transparency. To show the background through, the top picture needs an alpha channel: a value stored with each pixel that says how see-through it is. What a transparent background actually is explains the idea, and the alpha channel goes into the detail.
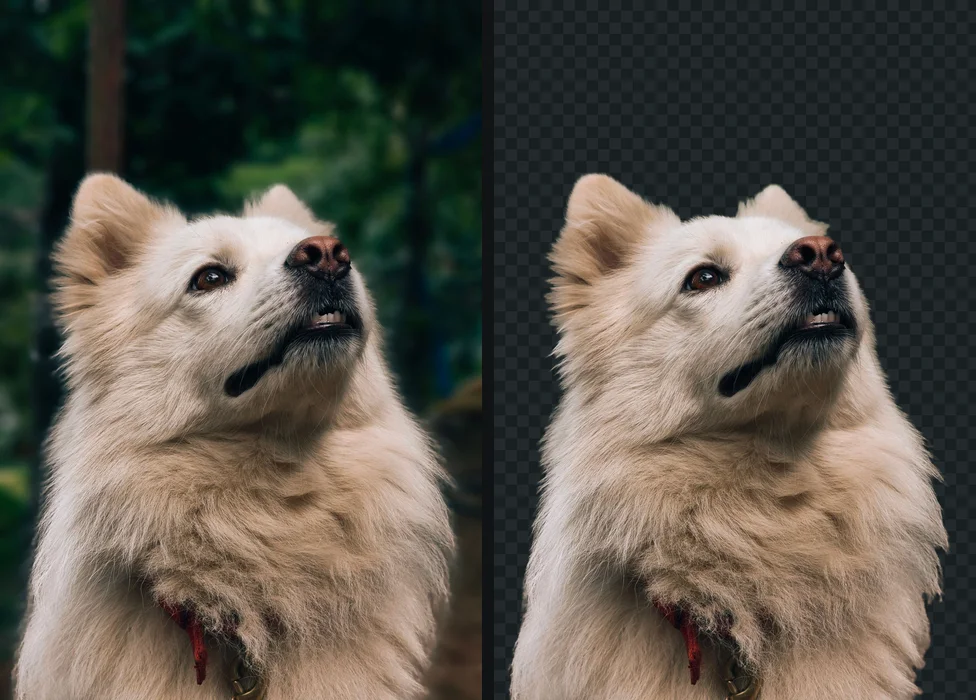
Two faults to rule out before you place anything:
- A fake. Some files show a grey and white checkerboard because the checkerboard was painted into the pixels, and it will be overlaid as a checkerboard. A fake transparent PNG shows how to spot one in seconds.
- A hard cut. A cutout whose edge is on or off for every pixel looks like a paper cut-out held against the scene. Keep the soft, part-transparent pixels along hair and fur. They are what lets a strand of hair look like hair on a new background.
If the subject is already a clean transparent PNG, move on. If it is still a photo with a background, how to make a transparent PNG compares the ways of getting one.
Fix the edge on the colour it is going onto
The commonest reason an overlay looks pasted is a thin rim round the subject, in the colour of the old background. A cutout from a bright window has a pale rim; one from a green lawn has a green fringe. On the old background nobody would see it, and on the new one it is the first thing anyone sees.
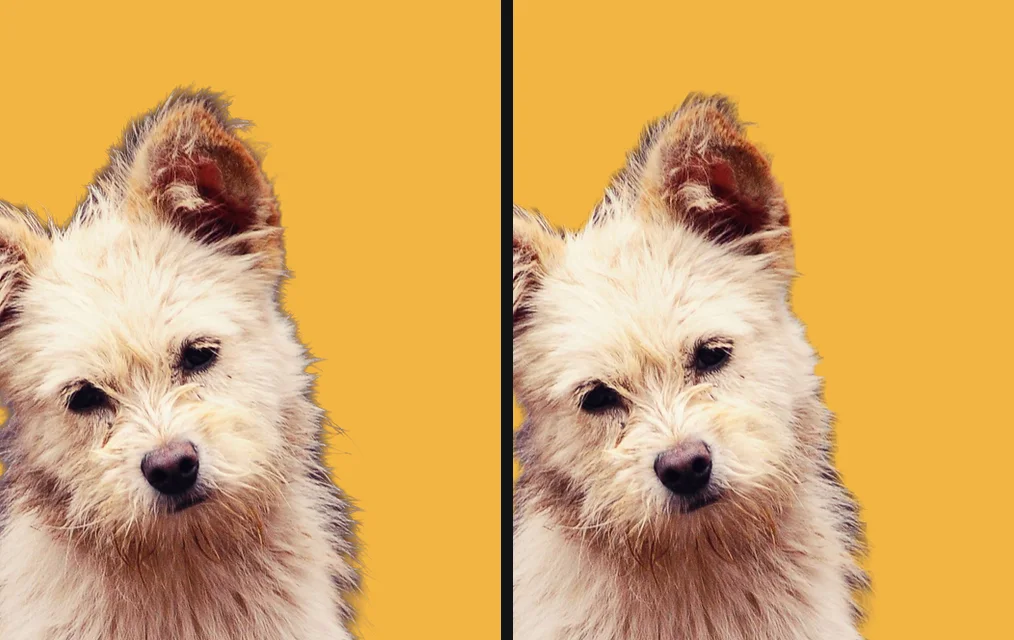
Do not wait until the cutout is in the editor to find it. In getPNG, set the background to a colour close to the one the cutout will sit on, zoom in on the edge and look. If there is a rim, use Edge shift to pull the outline in by a pixel or two, and Clean edge colour to take the old background out of the soft pixels along the edge. Both apply at full resolution and do not run the model again, so you can try a value and look straight away. White halos and jagged edges after a cutout goes through the cause and the other apps’ versions of the fix.
If the new background is a photograph, the rim colour matters most where the two are most different: a pale rim against a dark scene, a dark rim against a bright one.
Add a shadow
A shadow is what tells the eye the subject is standing on something. Without one, a subject floats a few millimetres in front of the scene however clean its edge.
You need two kinds, in this order of importance.
- A contact shadow. A small, dark, soft patch right where the subject meets the surface: under a shoe, under the base of a bottle, under the hem of a coat. It is short and fairly dark, and it is what makes the subject heavy.
- A cast shadow. A longer, softer shadow thrown away from the light, on the floor or the wall. It tells the eye which way the light is coming from.
getPNG’s drop shadow is built from the cutout’s outline, so it follows the shape of the subject. It has four settings: strength, softness, distance and angle. Softness and distance are shares of the subject’s size, so the same settings look the same on a small picture as on a large one. Switch it on, keep the strength moderate, keep the softness and distance small for a contact shadow and larger for a cast one, and set the angle so it falls away from the light in the scene. The shadow is saved into the file with the cutout, which means it travels into the editor with the subject. It is drawn from the outline, not from the scene’s surface, so a cast shadow that has to bend over steps or a curved wall needs doing in the editor.
A drop shadow on a transparent PNG goes through the direction, softness and distance of that shadow in more detail, and why a hard black one gives the cutout away. If you would rather add the shadow in the editor, most have one on the layer: a soft black shape, low strength, with the layer’s blend set to darken. The principle is the same. Soft, dark at the contact point, fading away from it.
Test the shadow against the scene
- Find the light in the background picture: look at where its own shadows fall, and where its highlights are.
- In getPNG, switch on the drop shadow and set the angle so it falls the same way as those shadows.
- Put the cutout on a background of the same colour as the surface it stands on, and look at the shadow at full size.
You should see: the shadow is soft, darkest where the subject touches the ground, and falls in the same direction as the other shadows in the scene.
If you do not: if it looks like a black outline, lower the strength and raise the softness. If it looks detached from the subject, bring the distance down so it starts at the contact point.
Match the light
The shadow is one clue to the light. The subject itself carries the rest.
- Direction. If the scene is lit from the right and the subject is lit from the left, it will look wrong however clean the edge is. This one cannot be fixed by editing. Pick another photo of the subject, or flip the picture if it contains nothing that would give it away, such as text, a parting or a watch.
- Brightness and contrast. A subject photographed indoors in flat light looks pale and grey on a sunny street. Bring its brightness and contrast towards the scene’s.
- Warmth. Daylight is cool, bulbs are warm. A subject that is a different colour temperature from the scene looks like a different photograph, and a small shift in the editor’s temperature control is usually enough.
- Sharpness and noise. A crisp subject on a soft, out-of-focus background looks pasted. If the background is blurred, the subject should be a little softer than its original photo would suggest, and the reverse holds if the background is crisp.
None of these needs a precise number. Look at the subject next to something in the scene that sits at the same distance, and move each control until the two look as if they were taken together.
Set the scale
Scale is the last thing people check and the first thing a viewer feels. The test is what the size implies about distance.
Find something of known size in the background picture: a door, a person, a car, a chair. Put the subject beside it and ask whether its size makes sense for where it stands. A bottle that is as tall as a door frame has to be a long way in front of the camera, or enormous. It is also worth checking where the subject’s feet or base land: its base should sit on the same horizon line as things at that distance, so a subject that is far away stands higher up the picture, and a nearer one lower.
Resolution is part of scale. If you enlarge the cutout in the editor, you are making new pixels from the ones you have, and the edge goes soft first. getPNG gives back the cutout at the full resolution of the photo, so you start with every pixel the camera recorded. Reduce a cutout to fit rather than enlarge a small one. DPI explained covers why the pixel count is the number that counts.
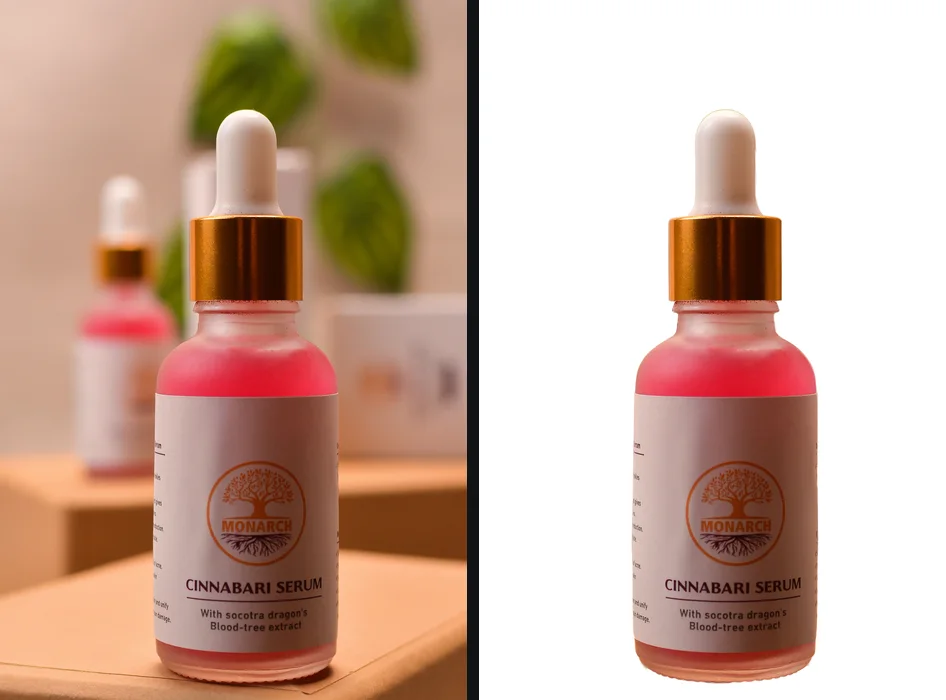
Order of work
Do things in the order that avoids redoing them.
- Pick the pair first. Compare the direction of light in both pictures before you cut anything out.
- Cut out the subject and check the edge on a similar colour to the scene.
- Place it in the editor, set the scale and the position.
- Match the brightness, warmth and sharpness.
- Add or adjust the shadow last, because it depends on where the subject now stands.
- Zoom to 100 percent and look along the edge and under the subject once more.
- Export, keeping the layered file if the editor has one, and the cutout PNG as the master.
Mistakes that give it away
- Overlaying a JPG. The box shows. Use a PNG with a transparent background.
- A shadow that points the wrong way. Worse than none. It contradicts every other shadow in the picture.
- A shadow from a different height. A long, hard shadow from a subject standing in soft light.
- A pale rim. Fix the edge before you place the cutout, not after.
- Enlarged, soft subject. It stands out against the sharper scene.
- Edges that are too clean. A subject cut with a razor edge in a slightly blurred scene looks pasted, so a pixel of feather often helps.
The free way
Make the cutout for your overlay
Drop the photo on getPNG, check the edge on the colour it is going onto, add a soft shadow if you want one, and download a transparent PNG at the resolution of the original. It has no watermark, and the picture never leaves your device.
The short version
An overlay looks placed when four things agree with the scene: a real cutout with a soft edge, a clean rim, a shadow that falls the same way as the others, and a size that fits the distance. getPNG makes the cutout and the shadow; the editor you use places it. Check the edge on a colour like the background before you start, and look again at full size before you export.
The steps, in short
- Cut the top subject out. Drop the photo on getPNG and download the transparent PNG at the full size of the original, so there is no background left to overlay.
- Check the edge on the real background. Preview the cutout on a colour close to the picture it is going onto. Use Edge shift and Clean edge colour until no pale or dark rim shows.
- Add a soft shadow. Switch on the drop shadow, keep it soft and close, and aim it away from the light in the background picture.
- Place it in your editor and set the scale. Put the PNG on the background in your editor, size it to the distance it should seem to be at, and match its brightness and colour to the scene.
- Zoom in and look at the edge again. Check the finished picture at full size, at the edge and under the subject, and fix the one thing that looks pasted before you export.
Questions
How do I overlay one image on another?
Put the top picture on a layer above the other in an editor that supports layers, which includes PowerPoint, Google Slides, Canva, GIMP, Photopea and Photoshop. For it to look right, the top picture must be a PNG with a transparent background, otherwise its own background comes with it as a rectangle. Cut the subject out first, then drag it into place and size it.
Why does my overlay look pasted on?
Usually one of four things: a rim of the old background still clings to the edge, there is no shadow under the subject, the light on the subject comes from a different direction to the light in the scene, or the subject is the wrong size for where it stands. Each can be fixed on its own, and the edge and the shadow are the quickest.
Do I need a transparent PNG to overlay an image?
Yes, for anything but a rectangle. A JPG has no transparency, so a JPG laid over another picture covers it with a box. A PNG, WebP or AVIF can hold an alpha channel, which is what lets the background show through round the subject.
Can getPNG put one picture on top of another?
No. getPNG removes the background from a picture and gives you a transparent PNG at the full resolution of the original, with an optional drop shadow built from the cutout. Placing that PNG on another picture is a job for an editor with layers. The cutout you download works in any of them.
How do I make the overlay match the background picture?
Match three things: the direction of the light (where the shadows in the scene fall), the brightness and warmth of the subject compared with the scene, and the sharpness. A subject lit from the left on a background lit from the right will look wrong however clean the edge is, and the fix is a different photo of the subject rather than an edit.
Is the picture uploaded when I make the cutout?
No. getPNG runs on your own device, so the photo is never sent anywhere. The overlay itself happens in whichever editor you use, and that editor has its own rules about what it does with your files.