Short answer
A waterslide decal is a printed film that slides off its backing paper in water onto a mug, a model or a tile. Because the film carries whatever the printer put on it, a photo with its background becomes a rectangle on the surface. Cut the subject out first, so only the subject is printed, then choose the paper: clear paper shows the surface through light colours, white paper has its own white base. Seal the print as the pack says, soak, slide and test on a spare piece before the good one. getPNG makes the cutout and does not print, mirror or seal.
A waterslide decal is a printed film on a backing paper. You soak it, the film floats free of the paper, and you slide it onto a mug, a model kit, a guitar or a tile, then press out the water. It is the closest a home printer gets to a picture that looks painted on, and it is also the print that punishes a sloppy edge the most, because the film is thin, glossy and sits on the surface for anyone to look at.
This page is about the file and the choices around it. getPNG does one job in that chain: it cuts the subject out of a photo and gives you a transparent PNG at the full resolution of the photo. It does not mirror, place or print the picture, it does not seal a sheet, and it does not draw a cut line. Those steps happen in your print dialog, at your desk and with the decal paper’s own instructions, which differ between brands and are not repeated here.
Why a cutout matters more here than anywhere
On a shirt transfer or a vinyl sticker you can hide a rough border. On a decal you cannot, for three reasons.
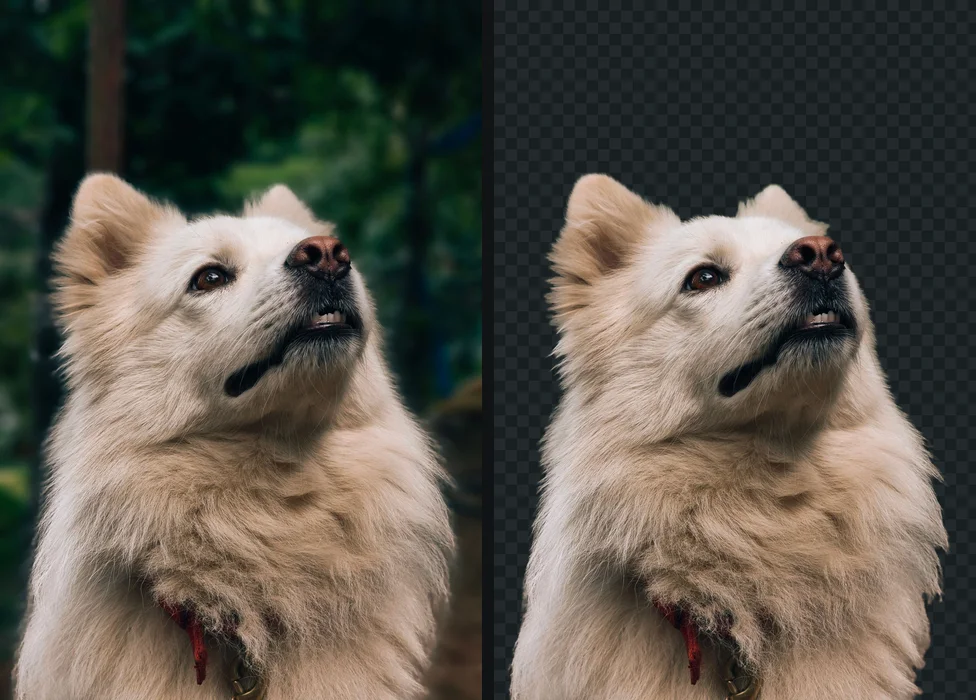
First, the decal film is the picture. Wherever the printer put ink, or white, there is film, and the film slides onto the surface as a single piece. A photo that still has its background prints as a rectangle of background, and what you apply is a rectangle.
Second, the film has an edge you can see and feel. Lay a decal over a mug and look along the surface in raking light: the outline of the film stands up slightly, and a straight rectangle edge draws the eye to it. A decal cut to the outline of a subject has a short, soft edge that the eye reads as part of the subject.
Third, trimming is the whole job. With a cutout you trim round the subject and follow its outline. With a photo you trim round the photograph, and a margin of film is left that you then have to hide. The iron-on transfer guide makes the same point about fabric, and the reasoning carries over directly.
Clear paper or white paper
Decal paper is sold in two broad kinds, and the choice decides what your file should look like.
| Paper | What is under the ink | What it means for your file |
|---|---|---|
| Clear | Nothing: the surface shows through | Light and pale areas let the surface through, so a bright subject on a dark mug looks faded. Works best on white or pale surfaces. |
| White | A white layer across the printed film | Colours keep their own look on dark or patterned surfaces. The white film has an edge, so how close you trim matters most. |
Two consequences follow, and neither needs a number.
On clear paper the picture is judged against the surface. A home inkjet printer has no white ink, so the white of a shirt in a photo, a pale cheek or a highlight prints as nothing, and the mug shows through. Preview the cutout on the colour of the surface before you print, so you see what the mug will see.
On white paper the picture is judged against its own film. The white base is a feature when you want colours that hold on a dark surface, and a problem if you trim loosely, because a white margin round the subject reads as a border. Cut close and see the next section.
The cutout and the soft edge
A good cutout keeps soft, semi-transparent pixels along fur or hair rather than snapping them to on or off, and that is the right result for a photo. For a decal it needs a second look, because those soft pixels print as faint ink dots.
On white paper, a soft edge prints on a white base and looks like a pale rim around the subject. On clear paper, it fades into the surface, which is usually what you want on a pale mug and a loss on a dark one.

Preview the cutout on the surface colour. In getPNG, set the background to that colour, zoom in, and use Edge shift to pull the outline in by a pixel or two, then Clean edge colour to recolour the edge pixels. A white halo or jagged edges goes through the cause. If the preview on black shows a white box, the file has no real alpha and will print that box, which a PNG that only looks transparent explains.
See the decal before you print it
- Open the cutout in getPNG and set the background to the colour of the surface: white for a white mug, a dark grey for a black one.
- Zoom in on the edge of the subject, where hair or fur meets the background.
- Look for a pale rim, and for any area that has gone invisible against that colour.
You should see: the subject reads clearly against the surface colour, with no pale rim at the edge. What you see is roughly what clear paper will give, since a light area becomes the surface.
If you do not: if a rim shows, use Edge shift and Clean edge colour and look again. If a pale part of the subject vanishes, the picture wants white paper, or a different surface.
Size and sharpness
The usual rule for print is about 300 pixels for every inch of the finished size, and it is arithmetic. A decal that will be 3 inches across needs a cutout about 900 pixels wide, and one that will be 5 inches across needs about 1,500. DPI explained is the page to read if the number stored in a file confuses you: it is a note, and the pixel count is the thing.
Count the pixels of the subject, after the crop, not those of the photo. If the subject fills a third of the frame, the cutout is a third as wide as the picture you started with. getPNG returns the cutout at the full size of the photo with nothing downscaled, so you begin with every pixel the camera recorded. If you still fall short, print smaller. Enlarging makes new pixels rather than recovering lost ones.
Decals are usually small, which helps. A 2 or 3 inch decal from a phone photo of the subject is almost always comfortably over 300 pixels per inch.
Printing, sealing and the water
This is the part that belongs to the paper’s pack, and a general page can only name the questions.
- Which printer type is the paper for? Inkjet decal paper and laser decal paper are different products. Using the wrong one is the commonest way to lose a sheet.
- Does the printed sheet need sealing? Inkjet ink dissolves in water, so the packs for inkjet paper usually have you seal the printed side with a clear spray or coating and let it dry before soaking. The pack names the sealer and the number of coats.
- How long to soak, and how to slide? The pack gives a time. Slide the film off the paper rather than peeling it, wet the surface, move the film into place and press out the water and air from the centre outwards.
- Does it need baking or curing? Some papers are left to dry, some are baked at a temperature the pack states. A decal that is not cured properly can lift in the wash.
None of this is stated as a number here because the numbers belong to the paper and the sealer you bought.
The mug test
Before the good mug, run the whole chain on a spare. A second-hand mug from a charity shop, a scrap tile or a pot plant saucer will do, as long as it is the same kind of surface.
- Print the cutout at its real size on plain paper first and hold it against the spare to check the size and the placement.
- Print on the decal paper, seal as the pack says, soak, slide and smooth.
- Leave it to dry or cure as the pack says, then look at it in daylight, from the side as well as from the front.
- If the decal will be washed, wash the spare the way the real piece will be washed and see what is left.
The test finds the three usual faults. An edge that lifts means the surface was not clean or the film was not pressed out. A pale rim means the soft edge needs Edge shift. A faded subject means clear paper on a dark surface.
If the piece will touch food or go in a dishwasher, the pack says whether the decal is suitable. Treat that as a question to answer before you start, not after, and do not assume it.
A checklist before the soak
- The subject is cut out, and a preview on the surface colour shows no pale rim and no vanishing part.
- You chose clear or white paper on purpose, for that surface.
- The cutout has about 300 pixels for every inch of the width you want.
- You know from the pack whether the sheet needs sealing, and with what.
- A plain-paper print held against the spare confirmed the size and the direction of any lettering.
- You trim close to the printed edge, with rounded corners.
- The full-size cutout is saved as the master, and the mug test came first.
The free way
Cut out the subject before you print
Drop the photo on getPNG, preview it on the colour of the surface, tidy the edge, and download a transparent PNG at the resolution of the original. It has no watermark, and the picture never leaves your device.
The short version
A decal is the film the printer covers, so a photo with its background becomes a rectangle on the surface. Take the subject out first, choose clear paper for pale surfaces and white paper for dark ones, preview the cutout on the real colour, and seal, soak and cure exactly as the paper’s pack says. Test the whole chain on a spare mug before the good one. For the file side of printing on other surfaces, PNG for shirts and make stickers from photos cover the same ground.
The steps, in short
- Cut the subject out of the photo. Drop the photo on getPNG and download the transparent PNG at the full size of the original. Preview it on the colour of the surface you will apply it to.
- Choose clear or white decal paper. Use clear paper where the surface colour may show through, and white paper where the picture must keep its own colours on a dark or patterned surface.
- Size the cutout and print a test. Work out 300 pixels for every inch of the finished width, print on plain paper at that size and hold it against the surface.
- Print on the decal paper and seal it. Print the cutout, let the ink dry and seal the sheet exactly as the paper's pack says, because unsealed inkjet ink can run in water.
- Trim, soak, slide and test on a spare. Cut close to the printed edge, soak the decal as instructed, slide it into place and smooth it. Try the whole process on a spare mug or tile before the one you care about.
Questions
Should I use clear or white waterslide paper for a photo?
It depends on the surface. Clear paper leaves the surface colour showing through anything light in the picture, which suits a white mug or a pale tile. White paper has a white layer under the ink, so the colours stay as printed on a dark or patterned surface, and the edge of the white film becomes the thing you have to trim carefully. The pack for your paper says which kind it is and how to use it.
Why does a decal need a cutout more than other prints do?
The decal film is the picture. Whatever the printer covered with ink, or white, is what slides onto the surface, and the film has a visible edge and thickness. A photo that still has its background becomes a rectangle with a border, where a cutout becomes only the subject, with nothing to trim round except its own outline.
Can I print white on a home printer for clear decal paper?
Most home inkjet printers have no white ink, so white or pale areas of the picture print as nothing and the surface shows through. That is the reason a pale subject looks washed out on a dark surface when it is printed on clear paper. White paper, or a design that avoids large pale areas, is the usual answer.
Do I need to seal a waterslide decal?
For paper that is printed on an inkjet printer, the packs usually say yes: the ink dissolves in water, so the printed side is sealed before soaking. Laser-printable papers are different. The pack says which kind it is and what to seal with, and that instruction outranks anything general written here.
Is a decal on a mug safe to wash?
Do not assume so. How durable a decal is depends on the paper, the sealer and whether the piece is baked or left to cure, and the pack says whether it is suitable for a mug that touches food or goes in a dishwasher. Try it on a spare and wash that before relying on it.
What file should I send to the printer for a decal?
A PNG with a real alpha channel, at about 300 pixels for every inch of the finished size, so a 3 inch wide decal is about 900 pixels across. Print it at its actual size. The number stored in the file matters less than the pixel count, as the DPI guide explains.