Short answer
An iron-on transfer from a photo looks like a sticker of the photo when the picture keeps its background, because the printed rectangle is what transfers. Cut the subject out first, so only the subject is printed, then check three things on the paper's own instructions: whether the print is mirrored, whether the paper is the light fabric or dark fabric kind, and how close you may trim. Print a test on plain paper, trim close to the subject, and keep the full-size cutout as your master. getPNG makes the cutout and does not mirror or print.
An iron-on transfer is a printed picture on a special paper that you press onto fabric with heat. Put a photo on it as it came out of the camera and you get what everybody gets the first time: a rectangle of photograph on the shirt, edges and all, as if somebody had ironed on a snapshot. That is the sticker-of-a-photo look, and it is the reason this page exists. The cure is mostly done before anything is printed, by taking the subject out of the photo so that the area round it is empty.
getPNG does that part: it cuts out the subject and gives you a transparent PNG at the full resolution of the photo. It does not mirror a picture, place it on a page, print it or cut it, and none of those steps is hidden in a setting. Mirroring and placing happen in your print dialog or an editor, and trimming happens with scissors or a cutting machine. The rest of this page is the order to do them in. For the file itself (pixels, transparency, dark-shirt edges) it leans on the PNG for shirts guide, which this one assumes you may want open beside it.
Why the photo ends up looking like a sticker
A transfer sheet is a carrier. Ink goes on one layer, the heat of the iron moves that layer to the fabric, and the backing paper comes away. The picture is whatever the printer put ink on. A photograph has ink on every pixel of the rectangle, so the whole rectangle moves.
There is a second thing behind it. On many papers made for light fabric, the film that carries the ink is a coating across the whole sheet, not only under the printed part. Whatever you leave unprinted can still transfer as a faint sheen or a stiffer patch, and that is why the packs tell you to trim close to the picture. A rectangle of photograph plus a margin of film makes the box worse.
With a cutout the picture has an outline, the area outside it is not printed at all, and you trim round the outline instead of round a rectangle. That is the whole trick, and it is the same one a sticker depends on. A waterslide decal depends on it even more, because the film is thin and its edge shows. Sublimation is the extreme case, because the printer has no white ink to cover a background that is left in.
Light fabric and dark fabric are different jobs
Transfer paper is sold in two broad kinds, and the pack tells you which you have.
| Paper | What it is for | What it means for your file |
|---|---|---|
| Light fabric | White and pale shirts, where the colours print as they are | Transparent areas print as nothing, so the fabric shows through. Usually mirrored. |
| Dark fabric | Black and coloured shirts, which carry an opaque layer under the ink | The picture lands as a solid patch with an edge, so the outline matters most. Mirroring depends on the paper. |
Two consequences follow, and neither needs a number.
First, on light paper the fabric colour shows through any soft pixel. A hair edge that fades to nothing looks lovely on a white shirt and fades into a pale-yellow shirt as well, because that is what you asked for.
Second, on dark-fabric paper the soft edge is the part most likely to look wrong. A semi-transparent pixel is printed as a faint ink dot on an opaque layer, and what you see depends on the paper. If the pack gives a rule about fine detail or thin lines, follow it, and if it does not, a test on a scrap of the real fabric is cheaper than a sheet.
Mirroring: the step people forget once
Because the printed side is pressed face down, the picture is reversed on the paper and the right way round on the garment. For most light-fabric papers that means you print a mirror image, and a forgotten mirror shows up as backwards lettering on the shirt. Some dark-fabric papers work the other way, which is why the rule is “read the pack”, not “always mirror”.
A mirror is a flip of the picture from left to right. It does not move or resize anything, and it is lossless on a PNG, so there is nothing to lose by doing it at the end. Three places to do it:
- The printer’s own dialog, which on many printers has a mirror or reverse option.
- An editor, such as Photopea or GIMP, with a horizontal flip on the layer before you export a copy.
- A design program’s print settings, if you placed the cutout on a page there.
Whichever you choose, keep the unmirrored cutout as your master. Mirrored copies are for printing, and a master that is already reversed gets mirrored twice by accident next month.
Test the direction before you use a sheet
- Put any lettering or an obvious asymmetry (a parting in the hair, a watch on one wrist) in the picture.
- Print the page on plain paper at the size you intend, with your mirror setting on or off exactly as the transfer paper says.
- Hold it against the fabric, or look at it in a mirror.
You should see: the lettering reads the right way round when the print is seen as it will be on the garment: the reflected view for a light-fabric paper that wants a mirror, the paper as printed for one that does not.
If you do not: if it reads backwards, flip the mirror setting and test again. If you cannot find one in the dialog, flip the picture in an editor and print that copy.
Cutting round the subject
There are two cuts, and it is easy to mix them up.
The first is the cutout: removing the background from the photo so the picture has an edge. That is getPNG’s job, and it keeps the soft pixels along a hair or fur edge rather than snapping them to on or off.
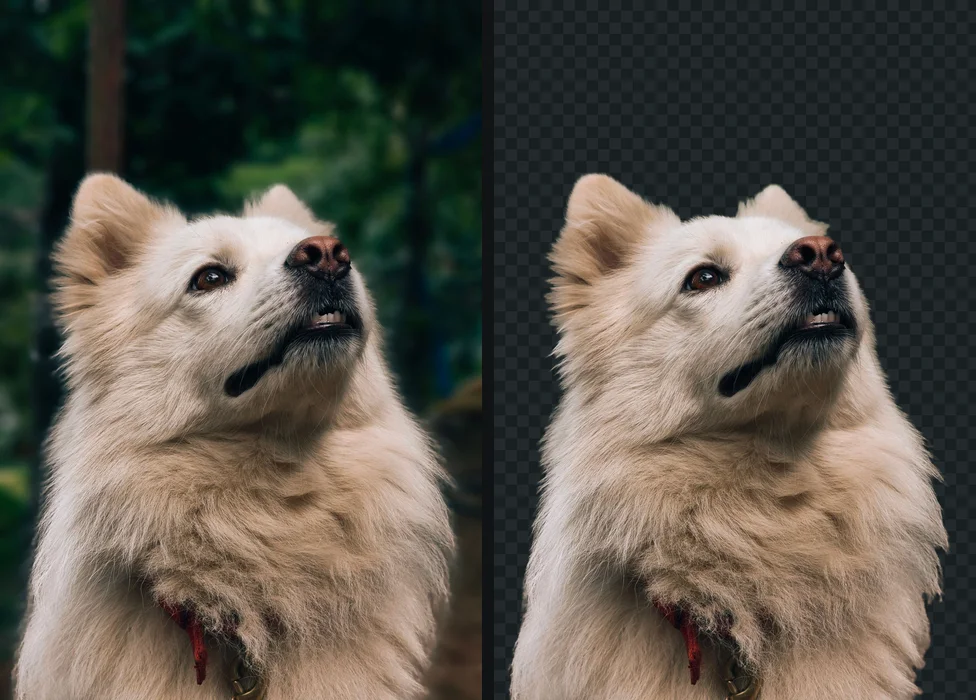
The second is the trim: cutting the printed sheet down before you press it. Cut a few millimetres outside the printed edge, or as close as the pack says, with sharp scissors and rounded corners. Rounded corners matter on the sheet itself, because a square corner of paper lifts first in the heat and peels.
If you add a white outline to the picture, it is made in an editor after the cutout, and it gives the trim somewhere to go: a few millimetres of printed border can be cut through without cutting the subject. Make stickers from photos shows the same idea for a vinyl sticker, and the comparison picture below is the same cutout with and without a border. getPNG does not add the border.
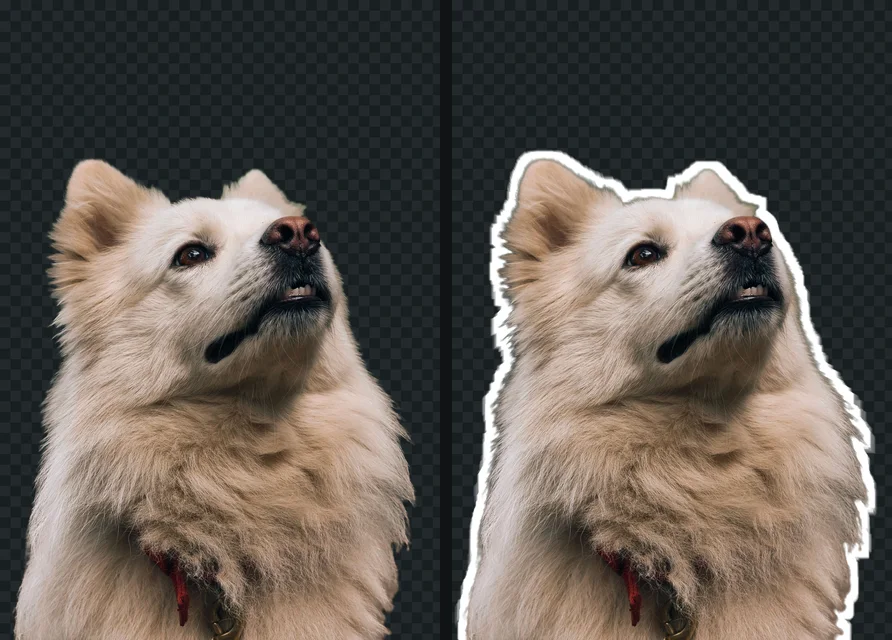
A cutting machine can follow the outline for you when the job is to print and then cut. Its own software draws the cut line from the transparent edge of your PNG, which is the other reason to send a real alpha channel and not a picture with a white box.
Size and sharpness
The usual rule for print is about 300 pixels for every inch of the finished size, and it is arithmetic. A transfer that will be 6 inches across needs a cutout about 1,800 pixels wide, and one that will be 8 inches across needs about 2,400. DPI explained is the page to read if the number stored in a file confuses you: it is a note, and the pixel count is the thing.
The catch with a cutout is that you count the pixels of the subject, after the crop, not those of the photo. If the subject fills a third of the frame, the cutout is a third as wide as the picture you started with. getPNG returns the cutout at the full size of the photo with nothing downscaled, so you begin with every pixel the camera recorded. If you still fall short, print smaller. Enlarging makes new pixels rather than recovering lost ones, and a photograph enlarges less well than lettering does.
Your printer’s own settings matter too. A photo on plain paper at the highest quality setting is a useful test, and the transfer paper’s pack may ask for a particular paper type setting, which is not something a file can decide.
Edges on the garment
The halo problem from the shirts guide applies on a transfer as well, and it is sharper here, because the edge pixels sit directly on the fabric. If the photo was taken against a light wall, the soft edge may carry a pale rim that you will not see on a white screen.
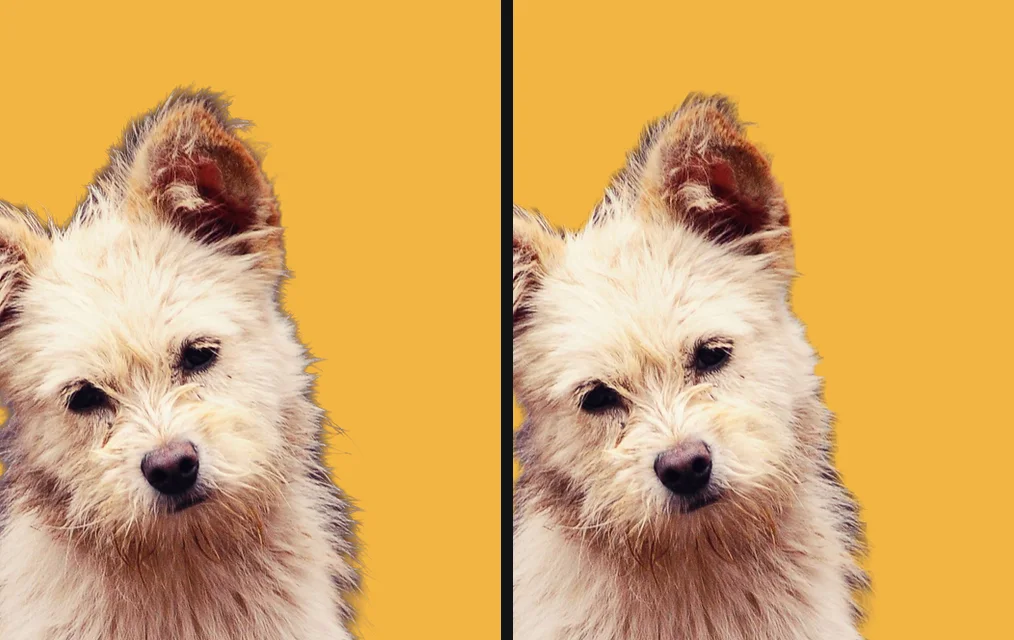
Preview the cutout on the colour of the fabric before you print. In getPNG, set the background to that colour, zoom in, and use Edge shift to pull the outline in by a pixel or two, then Clean edge colour to recolour the edge pixels. A white halo or jagged edges goes through the cause. A PNG that only looks transparent is the other thing to rule out: if the preview on black shows a white box, the file has no real alpha, and it will print that box.
A checklist before the iron
- The subject is cut out, and a preview on the fabric colour shows no pale rim.
- You know from the pack whether the print is mirrored, and a plain-paper test confirmed the direction.
- The cutout has about 300 pixels for every inch of the width you want.
- The test page shows blank paper where the picture is transparent, not a white box.
- You trim close to the printed edge, with rounded corners.
- The unmirrored, full-size cutout is saved as the master.
- You have read the paper’s own instructions for heat, time, pressure and washing, which are not stated here because they differ by paper and iron.
The free way
Cut out the subject before you print
Drop the photo on getPNG, preview it on the colour of the fabric, tidy the edge, and download a transparent PNG at the resolution of the original. It has no watermark, and the picture never leaves your device.
The short version
A photo on transfer paper prints as a rectangle, so take the subject out first and the rectangle goes away. Read the pack for mirroring and for which fabric the paper is for, test on plain paper held against the garment, trim close with rounded corners, and keep the full-size cutout as the master. Heat, time and pressure belong to the paper’s instructions, and the cutout is the part getPNG does for you.
The steps, in short
- Cut the subject out of the photo. Drop the photo on getPNG and download the transparent PNG at the full size of the original. Preview it on the colour of the fabric and fix any pale rim with Edge shift and Clean edge colour.
- Check what your transfer paper says about mirroring. Read the pack. Papers for light fabric usually want the print mirrored; some papers for dark fabric want it the right way round. Mirror in the print dialog or an editor, because getPNG has no mirror control.
- Work out the size and place the cutout. Multiply the width in inches you want on the fabric by 300 to get the pixels the cutout needs, then place it on the page in an editor or the print dialog.
- Print a test on plain paper. Hold it against the fabric, check the size and the direction of any lettering, and only then print on the transfer paper.
- Trim close to the subject. Cut a few millimetres outside the printed edge, following the pack's instructions, so little or none of the unprinted sheet reaches the fabric.
Questions
Do I have to mirror a photo for an iron-on transfer?
Usually, for transfer paper meant for light fabric, because the printed side is pressed face down and the picture ends up reversed on the paper and the right way round on the garment. Some papers for dark fabric are printed the right way round instead. The pack says which, and a test print on plain paper held against the fabric shows the result before you spend a sheet. getPNG does not mirror, so use the print dialog or an editor.
Why does my transfer have a shiny box round the picture?
On many light-fabric papers the layer that carries the ink covers the whole sheet, not only the printed part, so whatever is left round the picture can show as a sheen or a stiff rectangle. Trimming close to the printed edge removes most of it. Cutting the subject out first also helps, because there is then no printed background rectangle to trim round.
Can I iron on a photo that still has its background?
You can, and it transfers as a picture with edges, like a patch cut from a print. That is the sticker-of-a-photo look. If you want only the subject on the fabric, remove the background first so the area round it is transparent and prints as nothing.
What file should I send to my printer for transfer paper?
A PNG with a real alpha channel at about 300 pixels for every inch of the finished size, so a 6 inch wide design is about 1,800 pixels across. Print at the actual size. The number stored in the file matters less than the pixel count, as the DPI guide explains.
Does the transparent part of the PNG print as white?
It should print as nothing, and on a plain-paper test the area looks like blank paper. Some programs fill transparency with white when they print, and a white fill on a light-fabric transfer prints as a white box. If your test page shows a box, send the picture from a different program, or print it from the editor that placed it.
Will a cutout from getPNG work with a cutting machine?
The transparent PNG is the file those machines ask for when the job is to print the picture and cut round it. getPNG makes the cutout and does not draw cut lines or talk to a cutter, so the cut line is made in the cutter's own software.