Short answer
A fake transparent PNG is a picture with the grey and white checkerboard painted into its pixels, so it looks transparent in a preview and shows a checkered box everywhere you use it. Spot one by opening the image on its own in a browser tab or dropping it on a dark slide: a real one shows the page colour around the subject. Fix it by removing the checkerboard as a background, or by finding the original file.
A fake transparent PNG is a picture that looks see-through in a search result or a preview, then shows a grey and white checkered box the moment you put it on a slide, a T-shirt design or a web page. The checkerboard is not a sign of transparency in that file. It is part of the picture, painted into the pixels as ordinary grey and white squares, and no app can make it disappear by itself.
This guide explains where fake PNGs come from, how to spot one before you download it, how to check a file you already have, and how to fix it: either by removing the checkerboard as if it were any other background, or by finding the genuine file.
Why a checkerboard means transparency, and why it can lie
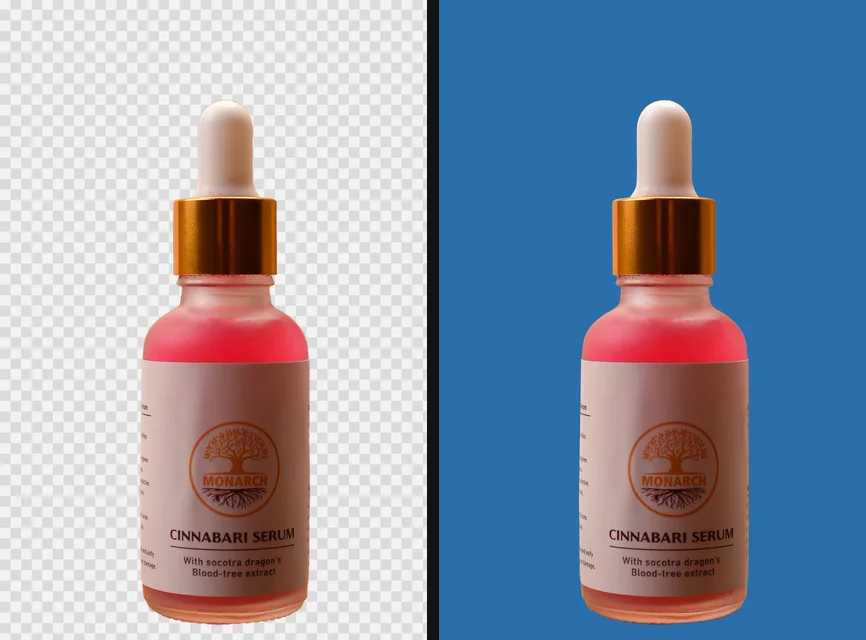
A transparent PNG stores a fourth number for every pixel, called alpha, which says how opaque that pixel is. Where alpha is zero, there is nothing to draw. A screen cannot display nothing, so image editors fill empty areas with a pattern that is obviously not part of any photo: a grid of light grey and white squares. That grid is a convention of the software, drawn live on screen and never saved into the file. What a transparent background really is explains the alpha channel in more detail.
Because everyone has learned to read the checkerboard as “transparent”, a picture that simply contains one looks transparent too. The file might be a PNG with no alpha channel at all, a PNG with full alpha where every pixel is opaque, or a JPG, which cannot store transparency in any form. All three look exactly like a real transparent PNG in a small preview.
Where fake PNGs come from
Hardly anyone makes a fake on purpose to trick you. They happen in a few predictable ways:
- Saved from a preview. Many free image sites show each picture over a checkerboard so you can see it is a cutout. On some of them, the image you get by right-clicking the preview is the preview, grid and all, while the real file sits behind a download button.
- A screenshot of an editor. Someone cuts out a logo in an editor, takes a screenshot to share it, and the editor’s checkerboard is in the screenshot.
- Exported without transparency. An export to JPG, or to PNG from an app that flattens layers, writes whatever is on screen, or fills the empty areas with a colour.
- Made to look the part. A picture posted to attract searches for “transparent PNG” gets clicks whether or not it is transparent, and a painted grid is the cheapest way to look like one.
- Copies of copies. Once a fake exists, it gets reposted, renamed “transparent.png” and indexed by image search, where its filename and surrounding text make it look like exactly what you searched for.
Image search makes this worse. Google Images has a colour filter for transparent images (under Tools, then Color), but it relies partly on how pages describe their pictures, and fakes with a baked-in grid have long been reported to slip through. A checkerboard in a thumbnail is not proof of anything.
How to spot a fake before you download it
A few quick checks catch nearly all of them:
- Look at the file name. If it ends in
.jpgor.jpeg, it is a fake, because JPG has no transparency. A.webpor.pngcould be either. - Open the image on its own. Click through to the full image, then open it in its own browser tab (right-click, then open image in new tab). A browser shows a lone image on a plain page, usually dark grey or white, not on a checkerboard. If the grid is still there, it is in the pixels.
- Zoom in. Most editors draw their grid at a fixed size on screen, so the squares stay the same size as you zoom. A painted grid scales with the picture: zoom to 400 per cent and the squares grow four times larger.
- Look at the squares near the subject. In a real transparent image, the subject’s edge meets nothing. In a fake, the edge was blended with grey and white squares, so you may see little grey notches or light halos where the outline crosses the grid.
- Look at the squares themselves. A grid drawn by software has perfectly crisp, even squares. A painted grid that has been saved as a JPG or resized along the way often has soft corners, faint smudges of colour, or squares of slightly different sizes.
Check any PNG in a minute
- Open a new presentation or document and set the page or slide background to black or a strong colour.
- Drag the image file onto it.
- Look at the area around the subject.
You should see: the slide colour right up to the edges of the subject. That is a real transparent PNG.
If you do not: a white box, a grey and white checkerboard or any rectangle around the subject means the image is not transparent. A white or black box can also mean an app flattened it on the way, which why a PNG shows a black or white background covers.
Checking a file you already have
If the picture is already on your computer, you can check the file itself rather than how one app displays it.
- On Windows, right-click the file, choose Properties, then the Details tab, and look at Bit depth. A PNG with an alpha channel usually reports 32 (8 bits each for red, green, blue and alpha). A PNG without one usually reports 24. A 32 does not prove the background is empty, only that the file can hold transparency.
- In an image editor such as GIMP, Photoshop or Photopea, open the file and hide or look at the layer. If the editor draws its own checkerboard and the painted one on top, you will see two grids that do not line up. Pick the colour of a background square with the eyedropper: a real transparent pixel has no colour to pick, a fake gives you a grey or white.
- By file size, roughly. A fake PNG of a small logo carries the grid’s detail as well, so it is often noticeably larger than a genuine cutout of the same size. This is a hint, not a test.
How to fix a fake transparent PNG
There are three routes, and the best one depends on what the picture is.
Find the real file first
The cleanest fix is not to repair the fake but to get the original. For a brand logo, the company’s press or media page usually has official PNG and vector files. For a stock or clip-art image, go back to the page it came from and look for the actual download button rather than the preview. A reverse image search (Google Lens, or the image search on Bing) often finds other copies of the same picture, some of which are real.
If the picture is a logo you will use at different sizes, a vector file is better than any PNG. getSVG’s guide to rebuilding a lost logo covers what to do when no good original exists.
Remove the checkerboard as a background
When no original turns up, treat the checkerboard the way you would treat a wall behind a person: as a background to remove. An AI background remover looks for the subject, and a grey and white grid rarely looks like part of one, so on a photo, a product or a character with a clear outline it usually separates cleanly.
- Save the fake PNG (or JPG) at the largest size you can find.
- Drop it on a background remover.
- Check the cutout against a dark colour. The pixels along the subject’s outline were blended with grey and white squares when the fake was made, so a faint light rim can remain.
- If there is a rim, shrink the outline by a pixel or two. In getPNG, that is Edge shift moved below zero; white halos around cutouts explains why this works and when it does not.
- Download the result as a PNG, which now has a genuine alpha channel.
The free way
Turn a fake PNG into a real one
Drop the checkered picture on getPNG. The model finds the subject, the edge is fitted to the full-size image, and you download a transparent PNG at the same resolution. Use Edge shift to trim a light rim, and check it on black in the preview.
Delete the squares in an editor
For a flat logo or lettering on a painted grid, a select-by-colour tool can be quicker and more exact than AI, because the squares are only two colours.
- Open the image in an editor that supports transparency. In GIMP, add an alpha channel first (Layer, Transparency, Add Alpha Channel), or deleted pixels turn into the background colour instead of empty space.
- Use a select-by-colour tool (GIMP’s By Color Select tool, under Select, By Color; Photoshop’s Select, then Color Range) and click a grey square, then add a white square to the selection.
- Keep the tolerance or threshold low, so you do not select parts of the logo that are also light grey or white.
- Delete the selection and export as PNG.
This fails as soon as the subject itself contains white or light grey, because those areas are selected too. It also leaves the blended edge pixels in place, which show as a jagged grey outline on dark backgrounds. For those cases the background remover is the better tool, and for artwork that has to be crisp at any size, tracing it to a vector with getSVG’s PNG to SVG converter replaces the pixels altogether.
When the fix does not work well
Some fakes cannot be rescued completely, and it is better to know that before spending an hour on one:
- The subject is grey or white. A white logo or a silver product on a grey and white grid shares its colours with the background. Neither a colour selection nor an AI model can tell the two apart everywhere.
- The original had soft edges or shadows. A real cutout’s fading shadow or wispy hair was mixed into the grid when the fake was flattened. That information is gone; the best a remover can do is make a new edge.
- Glass, smoke and semi-transparent parts. In a fake, a glass that should let the background through shows the grid through it instead, as solid pixels. Removing the background cannot restore a see-through glass.
- The fake is small or heavily compressed. A thumbnail-sized JPG has compression blocks along every square, which smear the grid into the subject.
In those cases, the realistic options are the original file, a new photo of the object, or rebuilding a logo as a vector.
How to avoid making a fake yourself
It is easy to create one without noticing:
- Never screenshot a cutout to share it. Export or download the file.
- Do not export to JPG anything that needs transparency. Use PNG or WebP.
- Check the export options. Some apps have a separate transparent background option at export, and some offer it only on paid plans (see removing a background in Canva for one example).
- Check the result on a dark colour before you send it, using the slide test above.
And when someone sends you a “transparent PNG” that shows a checkerboard on your slide, you now know it is not your software. It is the file, and it can usually be fixed in a minute. For more on how genuine transparent PNGs behave, the transparent PNG guide collects the rest.
Questions
Why does my PNG have a checkered background?
Because the checkerboard is part of the picture. Real transparency has no colour, and editors draw a grey and white grid only on screen to show where the empty pixels are. If the grid appears in a document, on a web page or in a viewer that normally shows a plain background, it was saved as grey and white pixels, and the file is a fake PNG.
How do I know if a PNG is really transparent?
Open it on its own in a browser tab, or place it on a dark slide or document. A transparent PNG shows the page or slide colour around the subject; a fake one shows the checkerboard. On Windows, the file's Properties, Details tab, usually shows a bit depth of 32 for a PNG with an alpha channel and 24 for one without.
Can I remove a checkered background from a PNG?
Yes, by treating the checkerboard as a background to remove. A background remover separates the subject from it in one step, and an editor's select-by-colour tool can delete the grey and white squares on a flat logo. The edge pixels were blended with the grid, so check the outline on a dark colour afterwards.
Why do Google Images results show a checkerboard that is not transparent?
Some pages publish pictures with the checkerboard baked in, often because the image was saved from a preview or a screenshot of an editor. A thumbnail with a grid proves nothing either way, and Google's Transparent colour filter has long been reported to let some fakes through. Open the image itself to check.
Is a JPG with a checkered background ever transparent?
No. JPG has no alpha channel, so a JPG cannot store transparency at all. A file ending in .jpg or .jpeg with a checkerboard is always a fake, whatever its name or the site it came from says.