Short answer
Shopify image size, from Shopify Help (checked September 2026): square product images of 2,048 by 2,048 pixels usually display best. The limits are 20 MB per file and 5,000 by 5,000 pixels or 25 megapixels. PNG and JPEG are the recommended formats. Shopify sets no background rule, but asks for a consistent aspect ratio on featured images, and one background colour across the store makes collection pages look tidy.
Shopify image size is the easiest of the marketplace rules, because Shopify is not a marketplace: it is your own store, and Shopify’s help pages give a recommended size, a few upload limits and one piece of real advice, which is consistency. There is no required background colour and no rule about how much of the frame the product fills. What decides whether a store looks professional is whether every product photo looks like it belongs with the others.
The numbers here were checked in September 2026 on Shopify Help: Product media types, Adding product media and Using the media editor.
Shopify image size: the numbers
| Shopify’s number | Note | |
|---|---|---|
| Recommended size | 2,048 x 2,048 px for square product images | “Usually displays best”, per Shopify |
| Maximum dimensions | 5,000 x 5,000 px, or 25 megapixels | See the note on large photos below |
| Maximum file size | 20 MB | Per image |
| Aspect ratio | Between 100:1 and 1:100 | Consistent across featured images |
| Media per product | Up to 250 images, 3D models or videos | Hard limit |
| Best formats | PNG and JPEG | Also PSD, TIFF, BMP, GIF, SVG, HEIC, WebP |
Checked September 2026.
Large camera photos and the 5,000 pixel limit
Shopify states the dimension limit two ways at once: 5,000 by 5,000 pixels, or 25 megapixels. A modern camera or phone photo can satisfy one and not the other. A 6,000 by 4,000 pixel photo is 24 megapixels, under the megapixel limit but wider than 5,000 pixels. The help page does not say which limit applies to it. Rather than find out on upload, resize large photos to 5,000 pixels or less on the longest side, or straight to the recommended 2,048 pixels.
This matters with a cutout that keeps full resolution, because a full-size 24 megapixel cutout is exactly this kind of file. Keep it as the master and export a store-sized copy from it.
Why 2,048 pixels
2,048 pixels is sharp on high-density phone and laptop screens and leaves room for a theme’s zoom, without the upload time of a full camera file. Shopify also says it resizes images automatically for each place they appear, a large version on the product page and smaller ones in collection grids, and picks a suitable format for each visitor’s device. So the size you upload sets the ceiling of quality, not the weight of every page. Reduce PNG file size and PNG versus WebP for websites matter more for images you host yourself than for product images Shopify serves.
Consistency: the one real rule
Shopify’s help page advises using a consistent aspect ratio, the height to width ratio, for all the images you use as featured or main images, so they appear the same size across collection pages. A grid where one product photo is square, one is tall and one is wide looks broken, whatever the theme.
Shopify does not mention backgrounds, but the same logic applies to them. A collection page is a grid of featured images. If half the products are on white, a few on grey card and one on a wooden table, the grid looks like three different shops. Three things to keep the same:
- The shape. Pick square unless your theme is designed for another ratio, and use it for every featured image.
- The background. One colour, exactly. For white that is
#FFFFFF. For a brand colour, write down the hex code and use that same code every time, rather than picking by eye. - The fill. The product taking up a similar share of the frame in every photo, so a small product and a large one do not look wildly different in size in the grid.
White, a brand colour, or transparent?
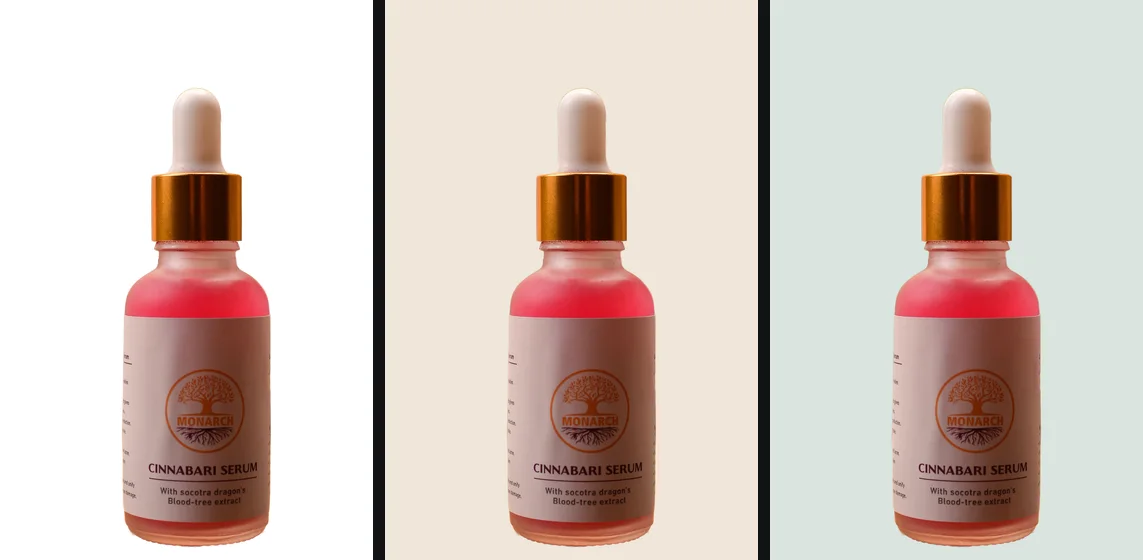
White is the safe default: it matches marketplace listings, so the same file works on your store and on Amazon, and it sits cleanly on most themes’ white pages. Product photos on a white background covers getting true white rather than light grey.
A soft brand colour can make a store distinctive: pale sand for ceramics, light grey for tech accessories. It works well on Shopify, where no one requires white, as long as every product uses exactly the same colour and the theme’s page background suits it.
Transparent PNGs are tempting, since the product would sit directly on the theme. The catch is that you no longer control what is behind it: that is up to the theme, which may put a page colour, a card or a tile there, and a theme change can alter it overnight. Soft edges, like hair on a model or fuzz on a knitted toy, also show a faint fringe on a colour different from the original background. Unless the theme is built for transparent product images, put the product on a colour yourself.
The free way
Every product on exactly the same colour
Drop each product photo and pick White, or Any colour and type the same hex code each time. Download JPG or PNG. The cutout keeps the full resolution of the original, so there is always enough to export a sharp 2,048 pixel square, and product photos from a shoot you have not launched stay on your computer.
How to make a consistent set of Shopify product images
1. Photograph every product the same way
Same light, same camera distance for products of similar size, landscape or square framing with space around each product. For cutouts, a background that contrasts with the product gives the cleanest edges.
2. Cut out and place on the store colour
Remove the background from each photo and set the background to your chosen colour. Check edges in the compare view; if a thin line of the original background clings to the product, shrink the outline slightly. White halos around a cutout explains the cause and the fixes.
3. Make each one square at 2,048 pixels
This step is not in getPNG, which keeps the photo’s original shape and size. Options:
- Photopea (photopea.com), free in the browser, which states on its learn pages that it does not upload files. Crop close with the Crop tool, Image > Canvas Size to a square with the product at a consistent fill, fill any transparent area with a layer of your background colour, Image > Image Size to 2,048 by 2,048, then File > Export As > JPG or PNG.
- Shopify’s media editor, after uploading: Crop and transform has Freeform, Original and Square presets, and Resize changes the actual pixel dimensions. Cropping to square cuts the photo down rather than adding space, so it only works when the product has room around it.
To keep the fill consistent across a catalogue in Photopea, use the same arithmetic each time: crop tight, take the product’s longest side, and divide by the fill you chose. At 80 percent fill, a product 1,600 pixels long goes on a 2,000 pixel canvas; then resize to 2,048.
4. Upload, order and describe
Add the images to the product. The first media item is the featured image, shown on collection pages and at checkout, so drag the clean product shot to the first position. Add alt text describing the product for screen readers and search; the media editor can suggest it, but check the suggestion describes your product accurately.
Check the collection grid, not the single image
- Upload images for at least four products in one collection.
- Open that collection page in your store preview, on a laptop and on a phone.
You should see: every product card the same shape, the same background colour edge to edge with no visible seams between image and card, and products that look proportionate to each other.
If you do not: if a card shows a slightly different shade, one image was exported with a different colour: redo it with the exact hex code. If cards are different heights, one image has a different aspect ratio. If products look very different in size, adjust the fill.
Keep master files, not just store images
A store’s photos outlive its theme. The redesign next year may want a different ratio, a seasonal campaign may want the products on a new colour, and a marketplace channel may want pure white. If the only copies are 2,048 pixel squares on this year’s colour, every one of those changes means cutting the products out again.
A simple structure avoids that:
- Originals. The photos straight from the camera, untouched.
- Cutouts. A transparent PNG of each product at full resolution. This is the master; every other version is made from it.
- Store exports. The square images on the store colour at 2,048 pixels, named after the product handle or SKU so they are easy to match in bulk.
With transparent masters, a change of store colour is a matter of placing each cutout on the new colour and exporting again, with no new cutouts and no reshoot. Name files consistently from the start; Shopify’s own advice on adding media is to use descriptive file names, which also makes bulk management in Content > Files far easier.
Shopify’s own background removal
Shopify’s media editor includes background removal and replacement through Shopify Magic, alongside cropping, resizing, rotating and drawing. It is convenient for a handful of products and it works on images already uploaded to your store’s files.
For a whole catalogue, the trade-offs are control and repeatability. You want exactly the same background colour and a checked edge on every product, and a step you can repeat identically for next season’s range. Doing the cutout before upload, at full resolution with a side-by-side comparison, gives you that, and a set of master files that do not depend on one platform.
When this does not work
- Glass, liquids and clear packaging. The original background shows through the product. Photograph these on your store colour instead.
- Products with fine edges on a very different colour. Fur, mohair or hair on a model shows its soft edge; a background close in brightness to the one in the photo hides it best.
- Photos from an iPhone. Shopify accepts HEIC, and so does getPNG. The first HEIC fetches a separate decoder (about 2 MB, once), so that one needs a connection.
- Stubborn gaps. getPNG has no brush yet to fix one area by hand. For a spot the cutout keeps getting wrong, finish it with a layer mask in Photopea.
If you also sell on marketplaces, the same master cutouts serve Etsy, which prefers landscape first photos and turns transparency black, and Amazon, which requires pure white on the main image.
The steps, in short
- Pick one background for the whole store. White, or one exact brand colour written down as a hex code, so every product sits on the same colour.
- Cut out each product and place it on that colour. Remove the background at full resolution and set it to the store colour. Keep a transparent PNG too, for banners.
- Make every featured image the same shape. Pad each image to square (or your chosen ratio) with the same background colour, with the product filling a similar share of the frame.
- Export at 2,048 by 2,048. JPG or PNG, under 20 MB, and no more than 5,000 pixels on a side.
- Upload and order the media. Add the images to the product, drag the best one first as the featured image, and write alt text.
Questions
What is the best image size for Shopify products?
Shopify's help page says square product images of 2,048 by 2,048 pixels usually display best. That is large enough to look sharp on high-density screens and for zoom, and well under Shopify's upload limits.
What is the maximum image size on Shopify?
20 MB per file, and 5,000 by 5,000 pixels or 25 megapixels, per Shopify Help checked September 2026. The page does not say which of the two dimension limits wins for a 6,000 by 4,000 pixel photo (24 megapixels, but wider than 5,000 pixels), so resize large camera photos to 5,000 pixels or less on the longest side.
Should Shopify product images be square?
Shopify does not require square, but it asks you to use a consistent aspect ratio for all featured images so they display at the same size on collection pages, and it gives 2,048 by 2,048 as the size that usually works best. Square is the usual choice because it fits product grids without awkward crops.
Can I use transparent PNGs for Shopify product images?
The file will upload, since PNG is a supported format. What appears behind the transparent areas is whatever the theme puts there, and it can change when you change themes. For predictable results, put the product on your chosen background colour before uploading.
Does Shopify have a background remover?
Yes. Shopify's media editor can remove or replace a background through Shopify Magic, alongside crop, resize and rotate. It works on images already uploaded to your store. For a consistent result across a catalogue, check each edge; for precise control over the colour and the edge, do the cutout before uploading.
Does image size slow down a Shopify store?
Less than on a hand-built site. Shopify says it automatically resizes uploaded images for each place they appear and serves a suitable format for each visitor's device, so a 2,048 pixel upload is not sent to a phone at full size. Uploading far larger than needed mainly costs upload time and storage.