Short answer
A product photography setup can start with a window, a sheet of white card and a phone, and most of the money you might spend is better kept. If the photos still fall short, upgrade in this order: something to hold the phone still, a second card to fill the shadow side, a plain surface that contrasts with the product, a way to repeat the same shot, and only then a lightbox or a lamp. Each step fixes one specific fault, so buy the one that matches what is wrong with your last photo, not the next item on a shopping list.
The usual advice on product photography equipment is a list: a tripod, a lightbox, two lamps, a backdrop stand, a remote shutter, a turntable. Someone who sells a few things online ends up with a shopping basket and the same photos as before. This guide goes the other way. It starts from the free kit and adds one cheap upgrade at a time, in the order each is worth it, so that every purchase fixes a fault you can actually see in your last photo. For the technique of using that kit (where to stand the product, how to curve the card, which phone settings matter), how to take product photos at home covers it step by step. This page is about what to add to it, and when.
Start with what you already own
A window, a sheet of white card from a stationery shop and a phone is a complete setup. It is worth taking the first batch of photos with exactly that, because it tells you what is missing. Without the test, any upgrade is a guess.
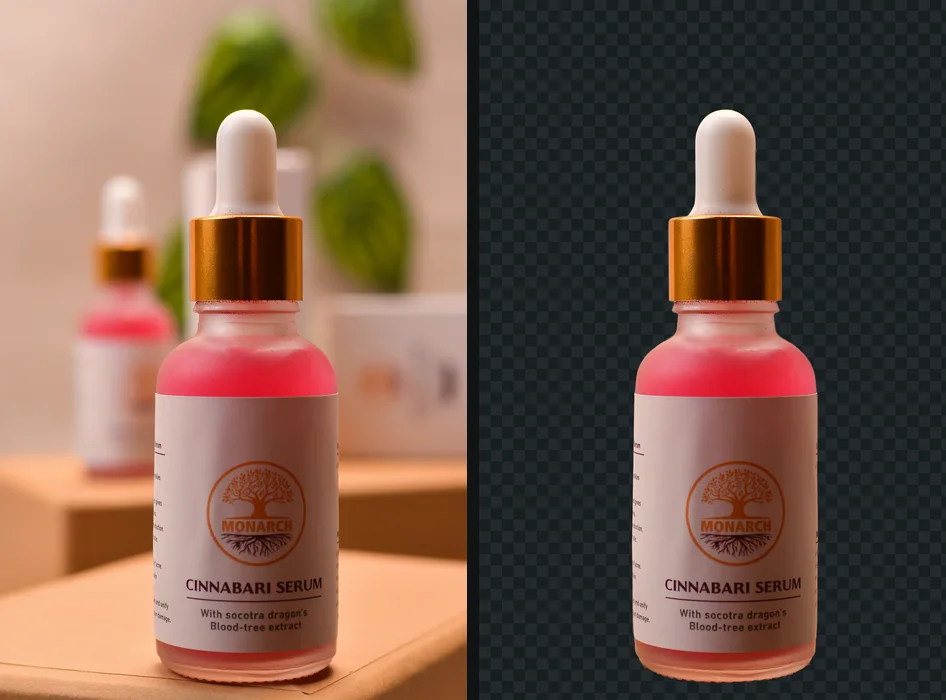
Take about ten photos of one product, in the daylight, with the flash off, and then do the one thing most people skip: open them at full size on a laptop or a large screen. A thumbnail forgives almost everything. The full-size view shows the four faults that each have a different cheap fix.
- The photo is soft. A tiny amount of movement, or a missed focus point, blurs fine edges and small print.
- One side of the product is dark. The window lights one side only, and the other side loses its detail.
- The colour is off. A yellow or orange cast usually means a lamp was on alongside the window.
- The edge is hard to see. The product is close in colour to what is behind it.
Write down which of those you see. The order below follows how often each one is the problem and how little it costs to fix, so the first upgrade is the one that fixes the most common fault.
Upgrade one: something to hold the phone still
If your photos are soft, this is the purchase. Indoor light is dim compared with outdoors, so a phone slows its shutter to gather enough of it, and a slow shutter turns a slight tremor in your hands into blur. A cheap phone tripod, a clamp that grips a shelf or a table edge, or a stack of books with the phone braced against it all do the same job. What matters is that nothing moves between pressing the shutter and the photo being taken.
A steady phone gives a second benefit that people underrate: the framing stays identical. Take one product, move it, take the next, and every photo is the same size, in the same place, at the same angle. A shop where every item sits in the same position looks more professional than a shop of better photos at random angles. If your phone has a self-timer, use it, because a tap on the screen is also a small movement.
This is the only upgrade on the list that has no real downside. Every other item depends on what you sell and where you shoot. A way to hold the phone steady helps all of them.
Upgrade two: a second card for the shadow side
If one side of the product is dark, you do not need a second light. You need to send some of the window’s light back into the shadow. A second sheet of white card, or plain white paper, propped on the side opposite the window does exactly that: it catches light that passed the product and bounces a little of it back. The shadow lifts, the detail returns, and the light is still the same colour as the window, which a second lamp would not be.
This is called a fill card, and it is the cheapest upgrade on the list, since you probably already own the paper. Move it closer and the shadow lightens; move it away and the shadow deepens. The skill is in finding the distance where the dark side keeps its texture but the product still looks like it has a form. A product with no shadow at all looks flat, and flat photos are harder to read than ones with a little shape.
Avoid crumpled foil, a mirror or a shiny board. They throw a hard, bright patch rather than a soft one, and that patch shows up as a reflection on anything glossy. Plain matte white is what you want.
Upgrade three: a surface that contrasts
If the edge of the product is hard to see, and the photo is sharp and evenly lit, the problem is the background. A white mug on white card has almost no edge. A person struggles to tell where one ends and the other begins, and so does a cutout tool.
The fix costs a sheet of card in another colour. A mid-grey, a soft pastel or a muted colour, chosen to be unlike the product, gives the edge something to hold on to. This surprises people who have read that product photos must be on white. They must, in the end, for some marketplaces, but the photo does not have to start there. Product photos on a white background explains which shops require pure white, and the point of the cutout is that you can shoot on any background that reads clearly and put the product on white afterwards.
Pick a colour that is unlike any part of the product, and watch for colour spill. A strongly coloured card throws a faint tint of itself onto glossy or pale surfaces, so a product with a shiny finish is better on a neutral grey than on a saturated colour.
Find the edge before you buy anything
- Open one of your photos at full size.
- Zoom in on the outline of the product, especially a handle, a strap or a thin part.
- Ask whether you can follow the outline with your eye without hesitating.
You should see: a clear boundary all the way round. A cutout will follow it just as cleanly.
If you do not: a stretch where product and background merge. Change the card to a colour that contrasts there, or move the product forward from the backdrop, and take the photo again.
Upgrade four: make the shot repeatable
Once one photo works, the next job is to get the second photo exactly like the first. This is not about equipment as much as habit, and it costs a roll of tape.
Mark the spot where the product sits and the spot where the phone sits. A small cross of masking tape on the surface and another at the base of the tripod is enough. Shoot the next product in the same place, from the same distance, at the same height, and the same window light on the same side. Photos taken this way line up when you put them next to each other in a shop, and later in the process they are easier to cut out, because the edge behaves the same each time.
Light changes through the day. A window gives different light at ten in the morning and at four in the afternoon, and a cloud passing across the sun changes the colour and the strength in a few seconds. If you are shooting a batch, shoot it in one sitting, near the same hour. If one photo has to be taken later, note the time, and do not mix the two sets in one listing unless you are prepared to correct the colour.
Upgrade five: a lightbox, or a lamp you control
Now, and only now, the question of buying a light. A lightbox is a small collapsible tent with a light, or a strip of lights, built into it. A desk lamp with a diffuser is the other common choice. Neither is better than a good window. What each gives you is something a window cannot: the same light, whatever the weather, at any hour.
That makes the decision about your routine, not about quality. Buy a controlled light if:
- you shoot in the evening or after work, when the window has gone dark;
- you photograph products every day, and cannot wait for the right weather;
- the room you have has no window that suits.
If none of those is true, skip it. A window is larger than any lightbox, and the larger the light source, the softer the shadows. A lightbox is a compromise of size for convenience.
If you do buy a controlled light, two points are worth knowing. First, check that its colour is described as daylight or neutral white, and not a warm yellow, because a warm bulb tints a white product and the cutout then has to put it on white while the product itself still looks cream. Second, do not run it alongside the window. Two lights of different colours on one product are the cast problem again, so switch the lamp on and close the curtain, or use the window and leave the lamp off.
What to skip, at least at first
Some items on the standard list can wait, or never be needed.
- A new camera. A phone from the last few years is sharp enough for a web listing. The limits of a home setup are light and steadiness, and a dedicated camera does not fix either.
- A remote shutter. A self-timer on the phone does the same job for nothing.
- A turntable. Useful for a 360 degree spin, which most small sellers do not publish.
- Several backdrops in different colours. One contrasting card, chosen for your product, is enough until you sell something it does not suit.
- A pure white backdrop that reads as 255 straight from the camera. This is the expensive version of a problem the cutout already solves, and it is covered in white background photo.
The step that no equipment replaces
The cutout. However good the set, a photographed card is slightly grey, slightly uneven and never quite the exact white a marketplace may ask for. Placing the product on a true background afterwards fixes the lot, at once, with no extra equipment.
The free way
Any product photo, onto pure white or any colour, at full resolution
Drop the photo, look at the edge in the compare view, choose White (or any other colour) and download. getPNG keeps every pixel of the original, so the picture comes back at the size you shot it, and nothing about it is uploaded anywhere.
If the cutout shows a pale rim round the product on a dark background, that is a different fault, covered in the white halo around a cutout. It comes from the edge of the original photo, not from your setup, though a contrasting background reduces it.
Keep two versions of every photo: the transparent cutout and the flattened version on white. The transparent one is the master. When a shop later wants a different background, a different shape or a banner, you start from it and do not need to shoot again.
Spending in order
Put together, the order is short:
- A steady phone, because soft photos are the commonest fault.
- A fill card, because a dark side is the next commonest.
- A card that contrasts, because a hidden edge costs the most time in the cutout.
- Tape marks, so the next photo matches the last.
- A controlled light, if the routine calls for it.
Each step is a response to something you can see. If you cannot see the fault, you do not need the fix. A window, a card and a phone get you much further than the shopping lists suggest, and the cutout does the rest. If what you sell is a dish rather than an object, the same window and card apply but the timing and the angle change, and how to take pictures of food covers that. If it is small and shiny, the fill card and the steady phone matter even more, and how to take pictures of jewellery goes through the light and the ground.
The steps, in short
- Start with the free kit. A window, a sheet of white card, a phone with the flash off. Take ten photos of one product and look at them at full size before buying anything.
- Hold the phone still. A small tripod, a clamp or a stack of books. Soft photos are the most common fault and the cheapest to fix.
- Fill the shadow side. A second sheet of white card or foil-free white paper propped opposite the window, so the dark side of the product keeps its detail.
- Choose a surface that contrasts. A mid-tone or coloured card behind the product gives the cutout a clean edge. It does not have to be white, because the cutout puts the product on white afterwards.
- Make the shot repeatable. Mark where the product and the phone sit with tape, so a second product is shot from the same place, in the same light, at the same size.
- Only then consider a lightbox or a lamp. A light you control matters when you shoot at night or every day. Until then the window is bigger, softer and free.
Questions
What is the cheapest product photography setup that works?
A window, a sheet of white card and a phone with the flash switched off. The window is a large, soft light that no small lamp matches, the card gives a plain background that can be curved so there is no hard line, and a modern phone is sharp enough for a listing. Everything else on a shopping list is an answer to a specific fault in photos taken with this kit.
Do I need a lightbox for product photos?
Not to start. A lightbox is a small tent with built-in lights that gives the same result every time regardless of the weather or the hour. That consistency is what you are paying for, so it earns its place once you shoot often, in the evening, or in a room with no good window. For a handful of listings in daylight it adds little that a window and a card do not.
Is a tripod worth buying for product photos?
Usually the first thing worth buying. Indoor light is dim, so the phone uses a slower shutter, and any movement of the hands turns into softness that only shows once the photo is full size on a screen. A tripod, a clamp or a stack of books removes that fault entirely, and it also keeps the framing identical from one shot to the next.
Do I need a better camera than my phone?
Rarely for web listings. The weak point in a home setup is the light and the steadiness, not the sensor. A dedicated camera helps when you need very fine detail on a small object, or print at a large size. Fix the light and the support first; if the photos are still short of what you need, the camera is the last thing to change.
Should the backdrop be white or a different colour?
It does not have to be white. A backdrop that contrasts with the product gives a background remover a clear edge to follow, and getPNG then places the product on pure white afterwards. A white product on white card is the hard case, because there is almost no edge for anyone, human or software, to find.
What is the first thing to check when a product photo looks wrong?
Look at it at full size, not as a thumbnail. If it is soft, steady the phone. If one side is dark, add a fill card. If the colour is odd, switch off the lamps so only window light reaches the product. Naming the fault tells you which cheap upgrade fixes it.